
February 12, 2014 06:01 by
 Ben
BenIn this blog I will run the steps to install Internet Information Services (IIS Version 8.5) on Windows Server 2012 R2. IIS 8.5 will be released with the Windows Server 2012 R2 product. With IIS 8.5, the IIS team continued its focus on scalability and manageability improvements.

1. Open Server Manager by clicking the Server Manager icon on the desktop, next to Start icon.
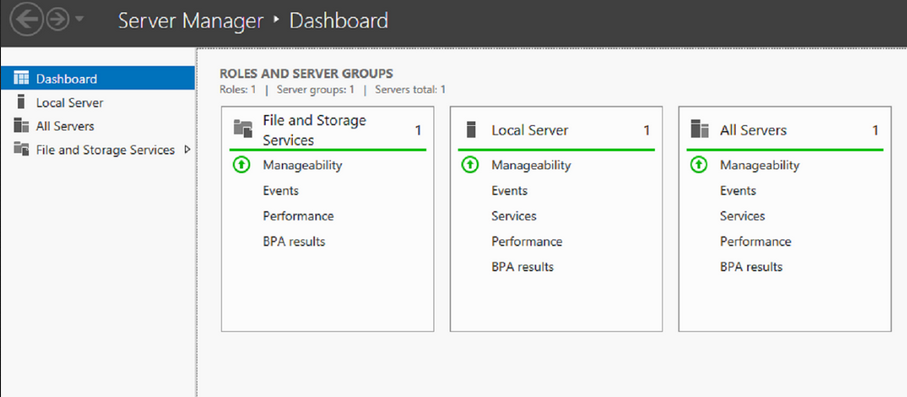
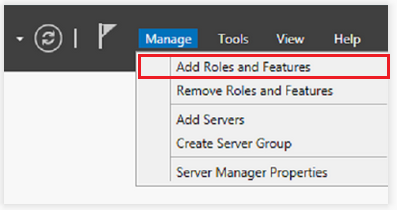
2. In the Server Manager window, with the Dashboard selected, click the Manage menu, and then click Add Roles and Features - click Next.
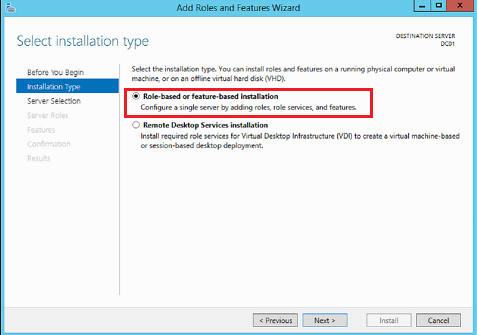
3. Select Role-Based o feature-based installation and Next
4. Select a server from the server pool and Next.
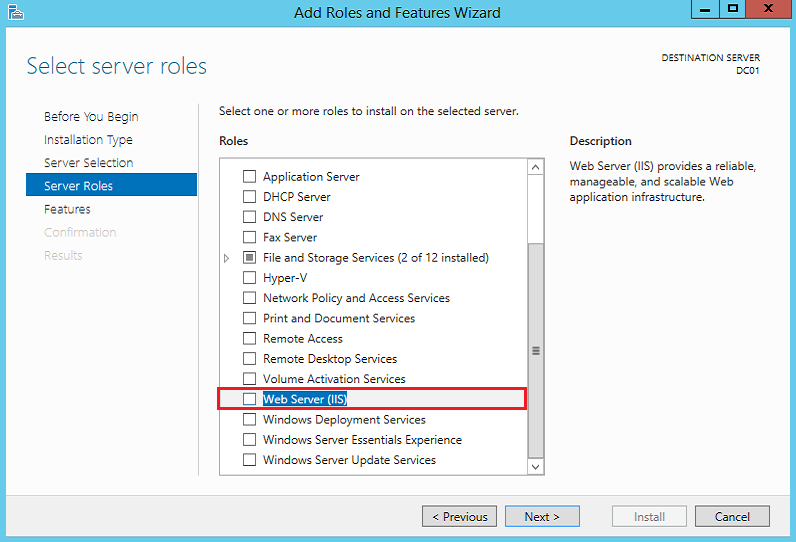
5. On the Select server roles, select Web Server (IIS) role. Click Next.
6. On the Add features that are required for Web Server (IIS), select Include management tools (if application). Click Add Features then click Next.
7. On the Select role services, select all the components depending on your requirement. Click Next.
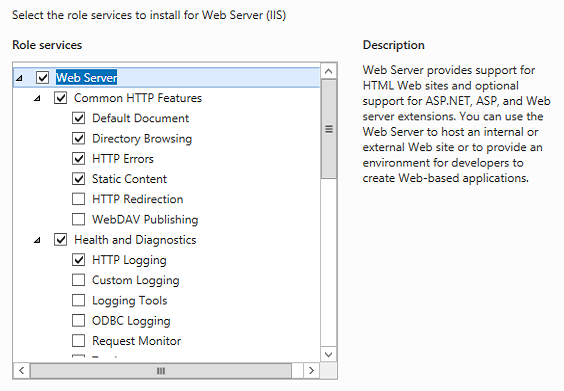
8. On the Confirm installation selections, check Restart the destination server automatically if required. Click Yes to confirm automatic restart. Click Install.
9. On the Installation progress screen, click Close once the installation is completed. It can be closed before installation is completed and it would not interrupt the installation.
10. To confirm if the installation is successful or not, open Internet Explorer and type http://localhost, hit Enter. Default IIS page will be displayed. It is a confirmation that IIS
is successfully installed.
US Affordable IIS 8.5 Hosting with ASPHostPortal.com :
"ASPHostPortal.com is proud to be one of the first ASP.NET Hosting providers to offer IIS 8.5 Hosting on our most improved Windows 2012 R2 hosting platform. It makes easy to use the most current version of websites tools like Visual Studio and WebMatrix. With our IIS 8.5 Hosting will increase your website security and reliability. We also allow Full Trust on our IIS 8.5 Hosting."