
December 7, 2013 06:25 by
 Ben
BenPowerShell v3.0 is the version included with Server 2012. A great place for PowerShell newbies to get started is with PowerShell's IntelliSense. This feature will help you learn and create the proper PowerShell. As you type in a PowerShell command, you'll see a list of possible syntaxes to go with the command.

For example, you may want to install a feature through PowerShell, but are unsure of the proper syntax or exact feature name. Features can be installed through PowerShell with the command instaW-windowsfeature-name. If you go into the Windows PowВerShell ISE (integrated scripting engine) and start typing Install . You'll see a dropВdown menu of all the possible commands that can be used with Install (image 1).
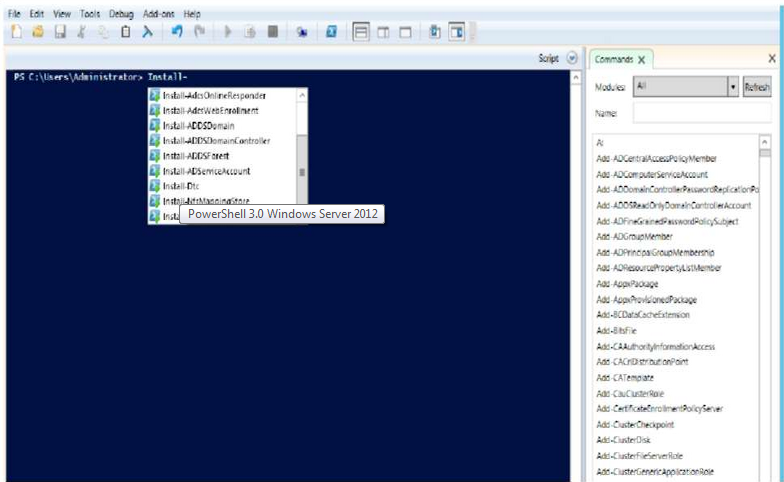
Image 1 - PowerShell IIntelliSense
Image 1 - that you also have a list of modules to scroll through to find the available cmdlets in PowerShell. PowerShell in Server 2012 provides command-line management , and with IntelliSense, also teaches you how to use correct PowerShell syntax at the same time.
WHile there are numerous new capabilities in PowerShell, another significant new feaВture that many of you will want to get acquainted with is Windows PowerShell Web Access. This feature allows you to manage remote machines using PowerShell through a web browser.
To set up this feature, follow these steps:
1. From Server Manager 's dashboard, click "Add roles and features." Click Next and select "Role-based or feature-based installation." Click Next. Select the server for installation. Click Next again. In the "Select server roles" window, click Features from the left-side menu. Scroll through the features until you see "Windows PowВerShell (Installed)." Expand this feature, and Windows PowerShell Web Access is listed.
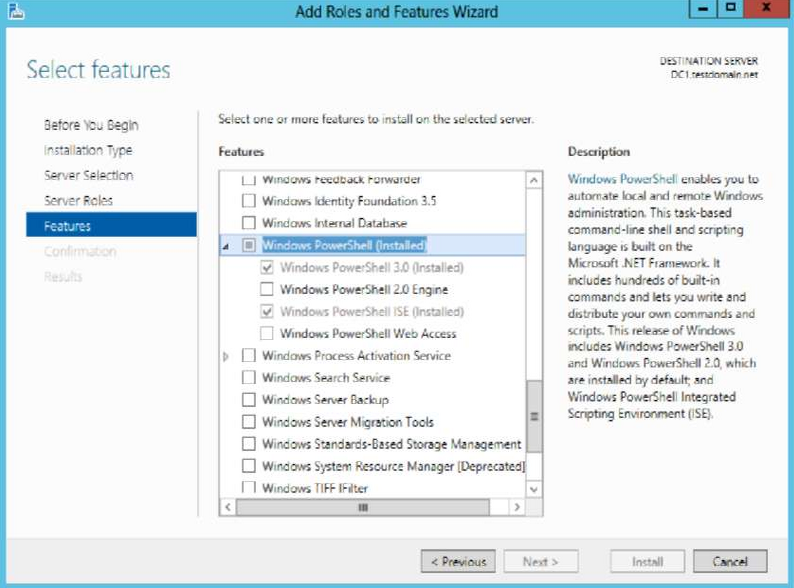
2. Select Windows PowerShell Web Access and click Add Features. Click Next three times and then click Install.
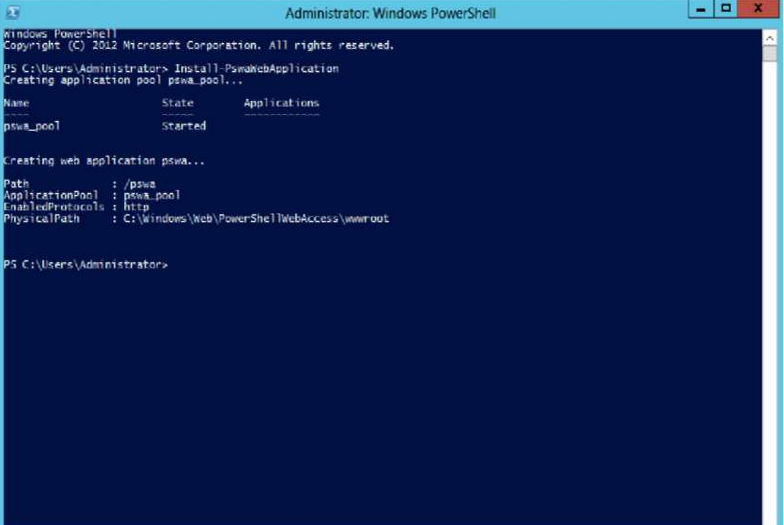
3. To automatically configure Windows PowerShell Web Access to use default settings, run Install-PswaWebApplication as an administrator in PowerShell.
After installation, you will see IIS listed in the Server Manager dashboard. The next step in setting up PowerShell Web Access is to configure IIS. In this example, you'll set up PowerShell Web Access in an IIS subfolder:
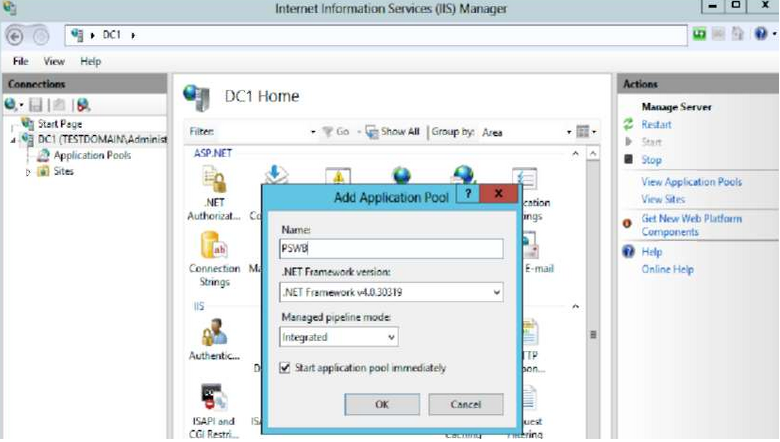
a. From Server Manager, click Tools and then IIS Manager. Now you need to create an application pool, which is done by expanding the IIS server name, right-clicking on Application Pools, and then selecting Add Application Pools.
b. Name the PowerShell Web Access application pool and click OK.
c. Right-click the Sites Folder under Default Web Site in the left hand IIS Manager pane. Select Add Application.
d. Enter an alias for the application and browse to select the application pool created in PowerShell Web Access. Also enter the physical path to PowerShell Web Access, which is file:///c:windowswebpowershellwebaccesswwwroot"C:WindowsWebPowerShellWebAccesswwwroot Configure and check authentication by using the "Connect as" and "Test settings" buttons. Click OK.
You can remotely use PowerShell Web Access through a browser by entering the name of the computer PowerShell Web Access is installed on and the name of the PowerShell Web Access Application as a URL in a browser.
SO, for this example, the machine name is DC1 and the PowerShell Web Access Application name is PSWA. After entering the URL http://dc1/pswa > Http://DC1/PSWA , We get the logon screen shown.
